eBay Photo Requirements: Size, Background & Checklist
The core eBay photo requirements are straightforward: every listing needs at least one accurate image, and it must be at least 500 pixels on its longest side. Sellers can add up to 24 photos. For clearer zoomed views, eBay recommends images around 1600 × 1600 pixels, with each file no larger than 12 MB.
Those are the technical limits. A useful photo set also has to answer a buyer’s practical questions: What exactly is included? What condition is it in? How large is it? Are there defects the title does not mention?
This guide separates eBay’s published rules from photography advice, then gives you a 24-slot shot planner. You do not need to fill every slot for every item. Use the slots that help a buyer understand the product without guessing.
eBay photo requirements at a glance
| Type | Photo detail | What to use | Why it matters |
|---|---|---|---|
| Required | Minimum number | At least 1 photo | The listing cannot be created without a picture. |
| Platform limit | Maximum number | Up to 24 photos | Additional views can document condition, details, and what is included. |
| Required | Minimum resolution | 500 pixels on the longest side | Anything smaller does not meet eBay’s picture policy. |
| Recommended | Resolution | About 1600 × 1600 pixels | Higher-resolution images remain clearer when buyers zoom. |
| Platform limit | Maximum file size | 12 MB per photo | Larger files may fail during upload. |
| Accepted | File formats | JPEG, PNG, GIF, TIFF, BMP, WEBP, HEIC, or AVIF | Use a supported format; JPEG is a practical default for most product photos. |
| Seller best practice | Main photo | Show the complete item, centered and easy to identify | The first image appears with the title in search results. |
| Prohibited | Added graphics | No borders, text, logos, marketing artwork, or watermarks | eBay’s picture policy prohibits these additions. |
| Required | Used or damaged items | Photograph the actual item; do not substitute a stock photo | The image must accurately represent the condition buyers will receive. |
These limits come from eBay’s current Picture policy and Adding pictures to your listings guidance. Recheck the official pages if you publish in a special category or if your workflow depends on an exact format or limit.
The main photo has one job: make the item obvious
Your first photo appears in eBay search results. Treat it as an identification image, not an advertisement.
If buyers see the listing in search but rarely open it, a compliant photo may not be the only issue. Use the no eBay sales diagnostic to compare impressions, page views, and sales before changing the image, title, or price.
- Show the full item face-on.
- Center it and fill the frame without cutting off edges.
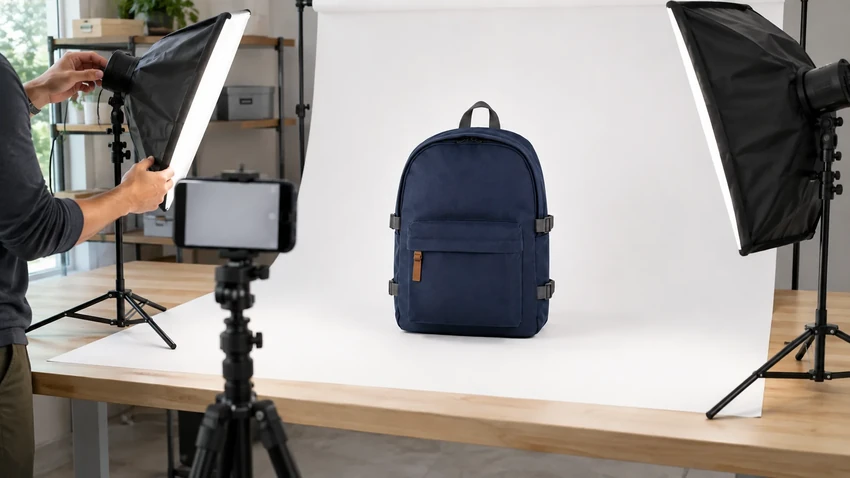
- Use a clean white or neutral background.
- Keep the color and proportions true to the item.
- For a single-item listing, do not show other variants in the main image.
- For a bundle, show every item included in the sale.
A white background is a safe default, but it is not always the clearest choice. A pale product can disappear against white, while reflective jewelry may be easier to read against a darker neutral surface. The goal is separation, not a particular shade.
Use soft daylight or diffused lamps and turn off the flash if it creates glare. Filters may make a photo look polished while making the item’s color less accurate. For resale inventory, accuracy is more valuable than mood.
A practical 24-photo checklist
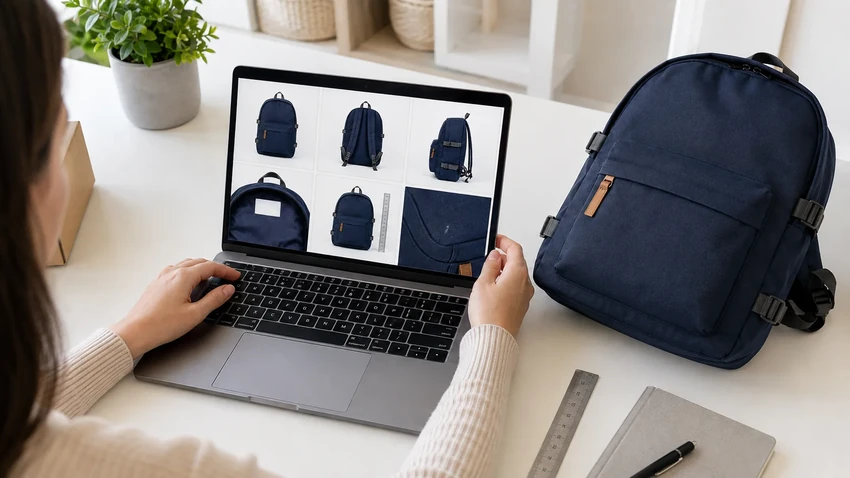
eBay allows up to 24 images, but “up to” is not a target. A sealed book may need six photos; a used camera kit may need 18. Start with the eight core views, add condition evidence, then use the remaining slots for details that matter in the item’s category.
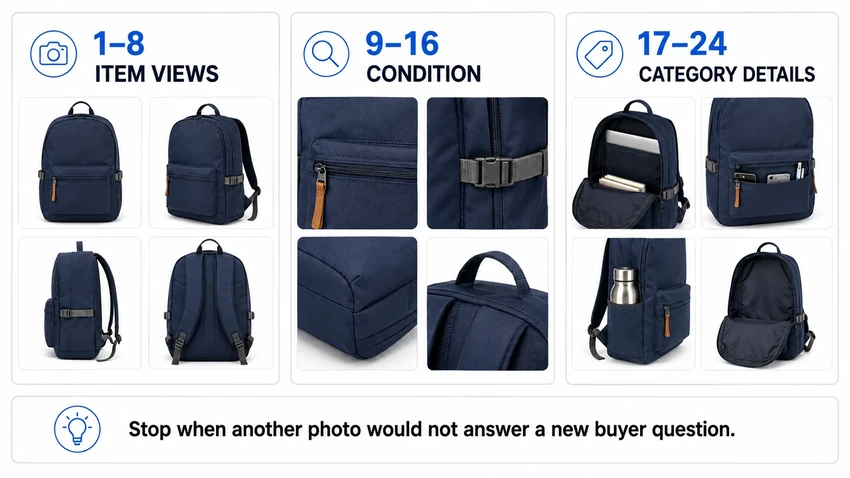
Slots 1–8: establish the item
- Main view. The complete item, face-on, with nothing important cropped.
- Back view. Show the full rear surface, not just a close-up.
- Left side. Include thickness, profile, and side hardware.
- Right side. Do not assume it is identical to the left.
- Top. Useful for openings, controls, collars, or lids.
- Bottom. This is often where wear, feet, labels, and residue appear.
- Open or interior view. Show compartments, lining, battery bays, or inner condition.
- Everything included. Put the item, accessories, manuals, cables, and case in one frame.
Slots 9–16: prove condition and identity
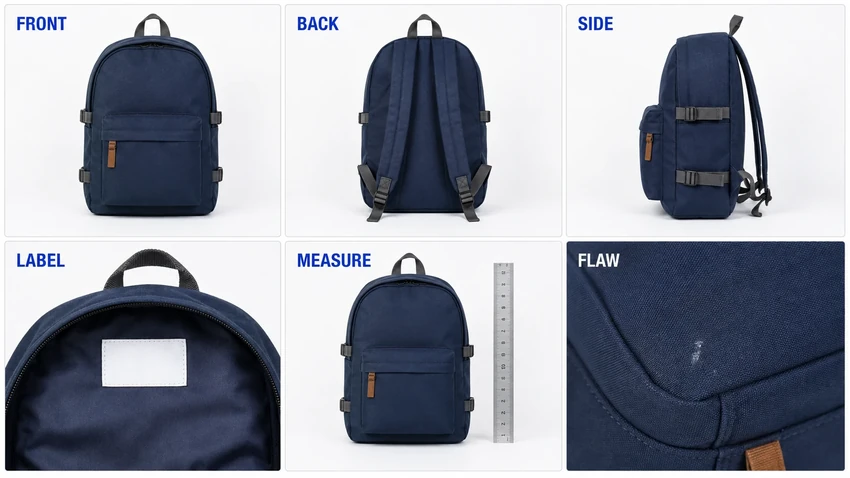
- Brand or maker mark. Photograph the actual mark clearly; do not add a logo in editing.
- Model or part number. Capture the label when it helps buyers verify compatibility.
- Size or specification label. Clothing tags, voltage plates, capacities, and material labels belong here.
- Measurement photo. Place a ruler or tape beside the item when scale is not obvious.
- Primary wear area. Soles, cuffs, handles, corners, screens, and connector ports deserve their own view.
- Worst flaw. Make the most important defect easy to see. Do not hide it at the end of the gallery.
- Second flaw or repair. Show scratches, stains, replaced parts, or visible repairs separately.
- Texture close-up. Let buyers judge grain, weave, finish, stitching, or surface wear.
Slots 17–24: answer category-specific questions
- Working display or indicator. For electronics, show the device powered on when safe and practical.
- Ports and connectors. Photograph the actual connector set instead of relying on a generic description.
- Moving parts. Show hinges, zippers, clasps, latches, drawers, or articulated joints in use.
- Accessory condition. Give a charger, remote, lens cap, strap, or case its own clear photo.
- Packaging. Show the box and its condition if the packaging is included and affects value.
- Scale in context. Add a neutral size reference when a measurement photo alone is hard to interpret.
- Additional variation or configuration. Use this only when it is the exact variant being sold.
- Buyer-question slot. Reserve the last image for the detail that repeatedly causes questions in this category.
Do not photograph private information, full access codes, home addresses, or unrelated serial data. If a serial number is necessary for identification or fraud prevention, decide how much should be visible before uploading the image.
What eBay does not allow in listing photos
eBay’s picture policy is unusually direct. Photos must accurately represent the item, and the following are not allowed:
- placeholder images used to deliver a message;
- stock photos for used, damaged, or defective items;
- added borders;
- added text, artwork, or marketing material; and
- watermarks, including ownership watermarks.
There is also a rights issue. eBay’s Images, videos and text policy tells sellers to take their own photos and write their own descriptions, unless they have permission to use someone else’s content or are using eligible content from eBay’s catalog.
Removing a distracting background is different from changing the product. A clean background can make the item easier to see; erasing a scratch, changing a color, or adding an accessory that is not included makes the image less accurate. If you need a cleaner setup, see our guide to removing the background from eBay listing photos.
Use the photos to build the listing, but review every inferred detail
A complete photo set can reduce the repetitive part of listing creation. Maxmerce can analyze product photos and produce a ready-to-review eBay listing with a title, description, category, and item specifics. You still decide whether each field is correct before publishing.
The review matters because a photo cannot prove everything. A model number may be hidden, a material can look similar to another material, and a defect may sit outside the frame. AI should not invent an unseen measurement, claim authenticity, or turn a visual guess into a product fact.
A safer workflow is:
- Photograph the item using the checklist above.
- Keep labels, measurements, included accessories, and defects visible.
- Create the eBay listing from the photos.
- Check the title, category, condition, description, and item specifics against the physical item.
- Review the image order and make the clearest full-item image the first photo.
- Publish only after the listing and the photos tell the same story.
Turn your approved photo set into an eBay listing draft
When the photos are ready, use the Maxmerce eBay AI Listing Tool to generate a title, description, category, and item specifics for review. Check every field against the physical item before you publish.
Quick pre-upload check
- At least one image meets the 500-pixel minimum.
- The main image shows the complete item and matches the exact variant.
- No file exceeds 12 MB.
- There are no borders, watermarks, marketing text, or added logos.
- Used or damaged inventory is shown with photos of the actual item.
- Every material flaw mentioned in the description is visible in at least one photo.
- Measurements and included accessories are clear.
- The image order moves from identification to condition to details.
Frequently asked questions
What is the minimum photo size for eBay?
eBay requires a photo to be at least 500 pixels on its longest side. Its current guidance recommends images around 1600 × 1600 pixels for better clarity.
How many photos can I add to an eBay listing?
You can add up to 24 photos. Use as many as needed to show the complete item, included parts, identifying details, measurements, and condition.
Does an eBay photo need a white background?
A white background is a safe choice, but eBay’s seller guidance also recommends clean neutral backgrounds. Use enough contrast to keep the item easy to see, especially for pale or reflective products.
Can I put text or a watermark on an eBay photo?
No. eBay’s picture policy prohibits added text, artwork, marketing material, borders, and watermarks.
Can I use a stock photo for a used item?
No. eBay’s picture policy does not allow stock photos for used, damaged, or defective items. Photograph the actual item so the buyer can see its condition.
Last reviewed against eBay’s published photo guidance on September 4, 2026. Marketplace rules can change; check the linked official policy before relying on an exact limit.